¶ Install Zabbix on Ubuntu 24.04
¶ Update packages first
sudo apt update && sudo apt upgrade -y
¶ Install MySQL
- Install, start and enable mysql
   sudo apt install mysql-server -y
   sudo systemctl start mysql.service
   sudo systemctl enable mysql.service
- Configure MySQL root password
sudo mysql
mysql> ALTER USER 'root'@'localhost' IDENTIFIED WITH mysql_native_password BY 'very-secure';
mysql> quit;
¶ Install Zabbix
- Install Zabbix repository
wget https://repo.zabbix.com/zabbix/7.0/ubuntu/pool/main/z/zabbix-release/zabbix-release_7.0-2+ubuntu24.04_all.deb
dpkg -i zabbix-release_7.0-2+ubuntu24.04_all.deb
apt update
- Install Zabbix server, frontend, agent
apt install zabbix-server-mysql zabbix-frontend-php zabbix-apache-conf zabbix-sql-scripts zabbix-agent
- Create initial database
sudo mysql -uroot -p
mysql> create database zabbix character set utf8mb4 collate utf8mb4_bin;
mysql> create user zabbix@localhost identified by 'password';
mysql> grant all privileges on zabbix.* to zabbix@localhost;
mysql> set global log_bin_trust_function_creators = 1;
mysql> quit;
- Import initial schema and data
zcat /usr/share/zabbix-sql-scripts/mysql/server.sql.gz | mysql --default-character-set=utf8mb4 -uzabbix -p zabbix
- Disable log_bin_trust_function_creators option
mysql -uroot -p
mysql> set global log_bin_trust_function_creators = 0;
mysql> quit;
- Configure the database for Zabbix server (make sure that you have the correct Database name, user and password)
sudo nano /etc/zabbix/zabbix_server.conf
DBName=zabbix
DBUser=zabbix
DBPassword=password
- Finish the install by visiting the local Zabbix website
http://server_ip_address/zabbix
Username: Admin
Password: zabbix
¶ Custom Template MIB
These are the steps to take the Ceragon Radio MIB and turn it into a Template. In this case all we want to monitor is the radio's RX (genEquipRfuStatusRxLevel) and TX (genEquipRfuStatusTxLevel) levels. That is all we will have enabled. This is tricky since there are two radios in the unit and a total of 4 interfaces in a table.
- Install SNMP
sudo apt install snmp
sudo apt install snmp-mibs-downloader
- Install mib2zabbix
sudo apt-get install perl libxml-simple-perl libsnmp-perl
curl -sL -o mib2zabbix https://raw.githubusercontent.com/cavaliercoder/mib2zabbix/master/mib2zabbix.pl
chmod 755 mib2zabbix
- Download the Ceragon/Cambium Radio MIB
https://github.com/librenms/librenms/blob/master/mibs/ceraos
- Genrate the zabbix XML template
snmptranslate -Tz -m ./MWRM-RADIO-MIB.txt | ./mib2zabbix -o 1.3.6.1.4 -f mwrm-radio.xml -N MWRM-Radio
- Download the mwrm-radio.xml to your desktop and login to the zabbix web interface to import it.
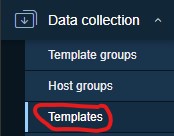
- Click on Data Collection and then Templates
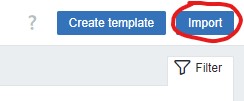
- On the top right of the page click the Import button
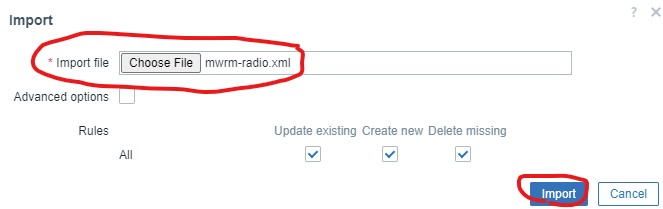
- Choose the mwrm-radio.xml file and click the import button
- Once the template is imported, find it and click on Discovery

- Find the genEquipRfuStatusEntry Discovery and click on Disabled to Enable it

- Click on Item Prototypes

- Find genEquipRfuStatusRxLevel for {#SNMPINDEX} and genEquipRfuStatusTxLevel for {#SNMPINDEX} click the check mark to the left and on the botton click Create Enabled

- Go and create your new host, put the hostname, choose your newly created template, host group SNMP Interface IP Address, community and create it.
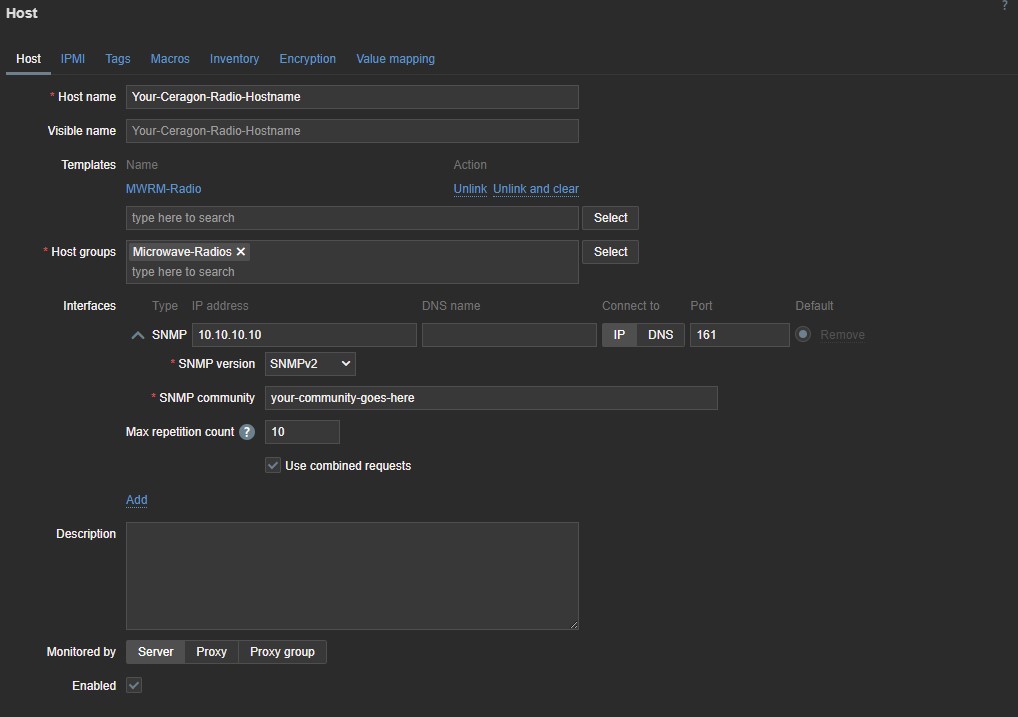
- Wait a little bit for zabbix to poll the radio and you will see data coming in

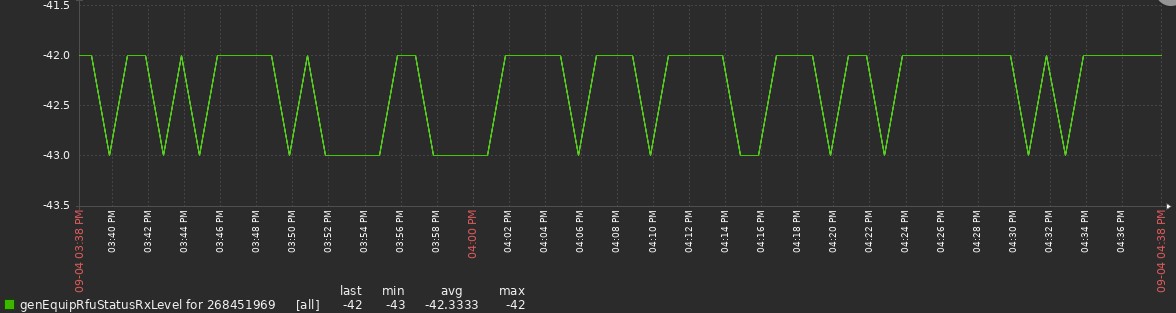
- You are done! You can have a graph with the RF Level